
Studio 0: Getting Started
Do not start studios before class. Come to the session and work on the studio with other students!
Studio Sessions Overview
Studios are a chance to learn the module’s topics by actively solving problems with other students.
Credit is based on active, good faith participation (not correctness or completion):
If you arrive late (more than 15 minutes) or don’t actively contribute to the work, you will not be given credit.
Be a constructive member of group:
Complete the prep materials.
Ask questions and discuss as a group/with your TA. Studio is a great time to further your big-picture understanding.
Be polite and respectful of your group members!
Make sure every member of your group understands your group’s work and the topics being used.
Studio Setup and Procedure
Form a group of 2-3 students
Find a TA to work with (TAs may be working with 2-3 groups at a time)
If you haven’t already, complete the software setup.
Choose one group member to open VS Code. They will be in charge of typing code for the first part of the studio. You will rotate this responsibility throughout the studio, but the initial person will have to be comfortable with others typing on their computer.
Everyone else, open the studio instructions on your own computer.
Choose one group member to complete the following instructions:
Click here
Go to the bottom of the page, where it says OR Create a new team.
Enter your group’s last names and “Studio0” into the text field. Ex: “XiaSmith-Studio0”
Click the button to create the team.
After the team is created, all other members of your team should complete the following instructions:
Click here
Find the team your groupmate created.
Join the team.
If you join the wrong team, you will need to contact one of the instructors or Head TAs to fix it.
VS Code person: import the studio repository as described in the software setup
Studio 0: Some Helpful Tools
You will examine a series of simple Java programs and run each program to ensure it performs its task correctly.
LunchReceipt
In VS Code, open src/studio0/LunchReceipt.java. Unless stated otherwise, most code in this class will be in a src folder.
The code in the main method tells a story about an event that took place. Talk through the story as a group.
Run the program. There are two main ways to run a program:
With the file open, click the green Play button at the top
Right-click on the file in the Package Explorer or right-click anywhere in the file you want to run. Click “Run As” and then “Java Application”.
The first option is faster, but if you want to make sure you’re running the right program, try the second option.
Observe the output of the program. How could we check if this output is correct?
One way to verify the output is to get out some paper or a calculator and crunch the numbers ourselves. This works well for simple computations, but when things get complicated, we’d like a way to break down the program and check each step.
Fortunately, VS Code provides a way for us to walk through the code step-by-step, using a process called debugging.
To start debugging, we first need to set a breakpoint. A breakpoint is the point in our code where we want the computer to stop and show us what’s going on.
Set a breakpoint on the first line of the program (line 7).
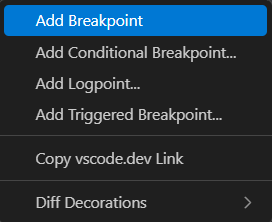
There are two ways to toggle (enable or disable) a breakpoint:
Right-click on the line number and select “Add Breakpoint”
Click the circle next to the line number
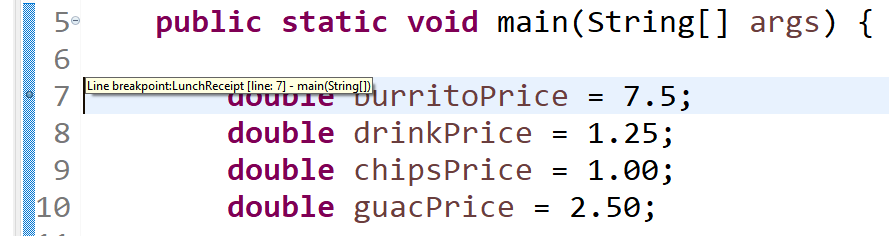
Once the breakpoint is set, you should see a small red circle next to the line number:
Start Debug Mode by right clicking the file and selecting “Debug Java”:
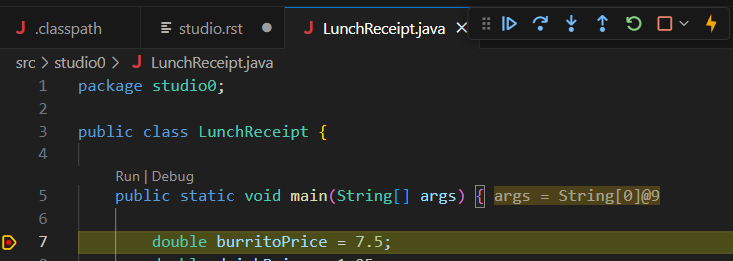
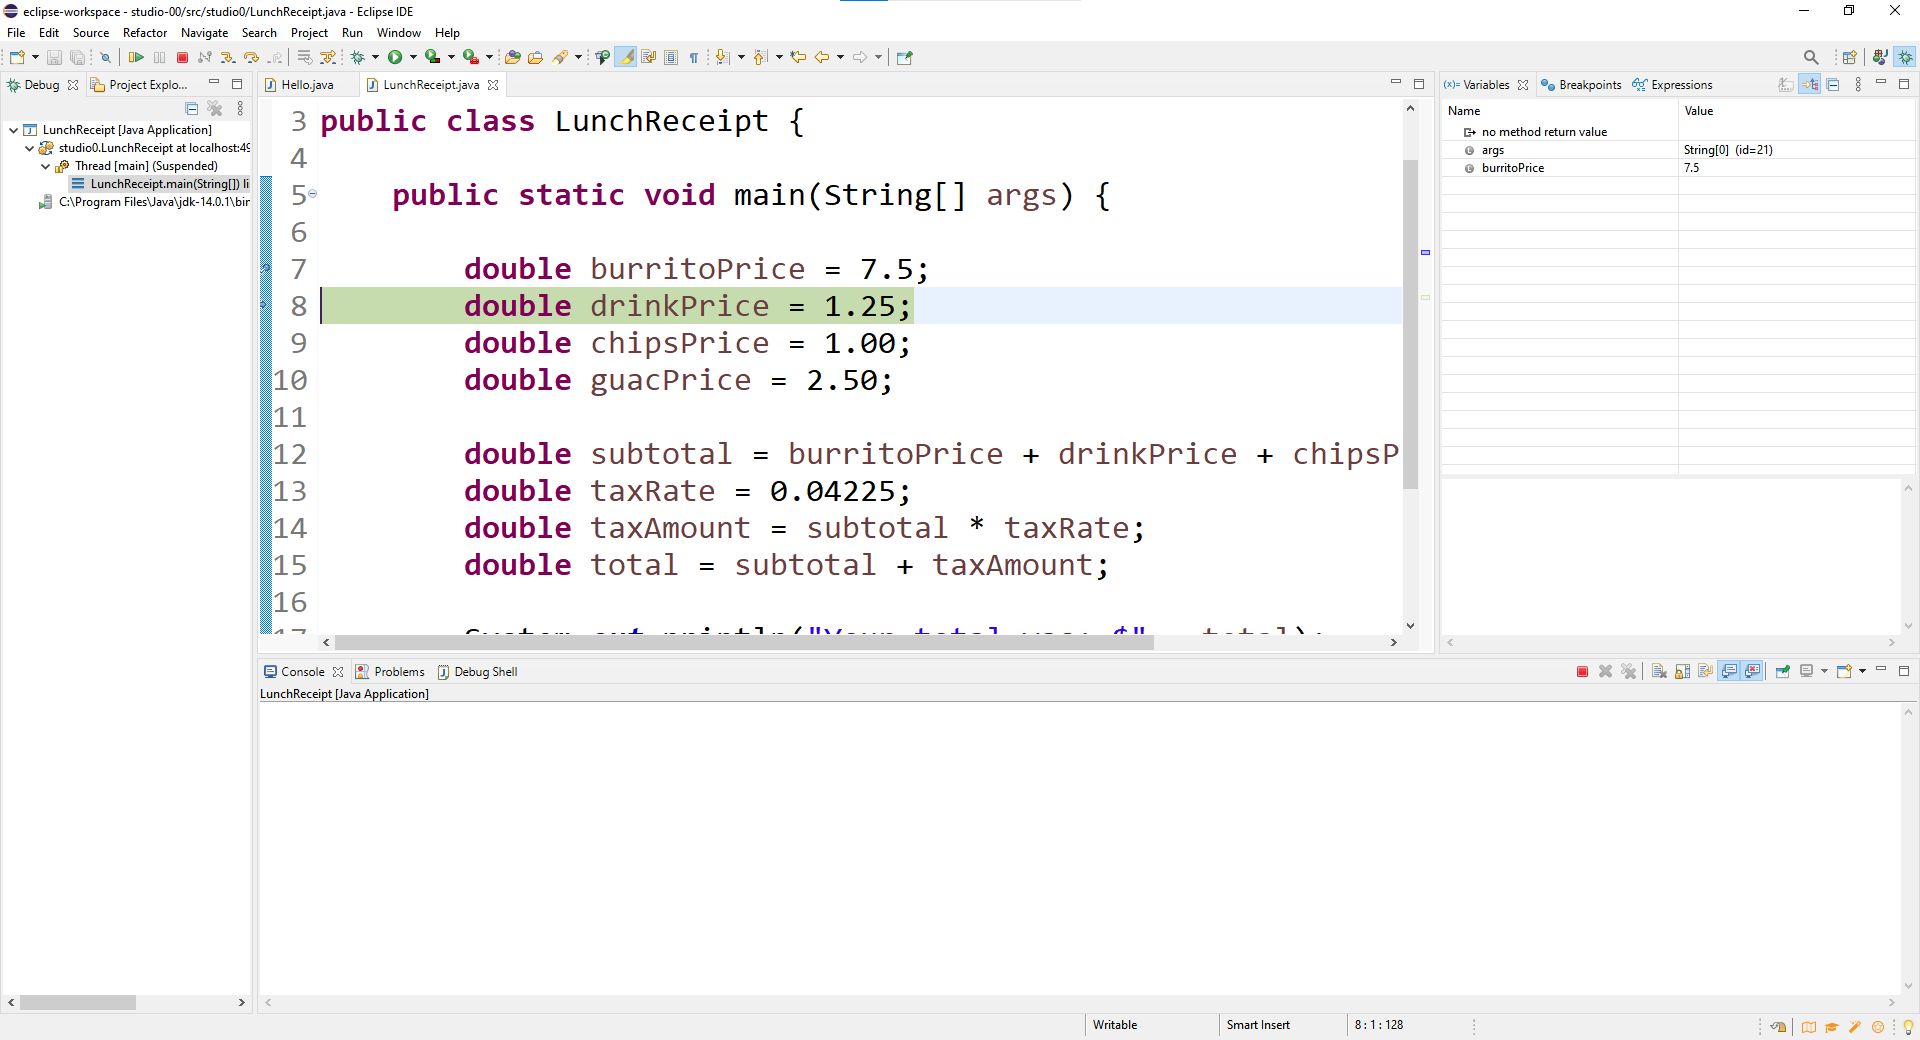
You will see the line of code highlighted and a new set of buttons at the top of the screen:
This is called the debugger. The program is currently paused on line 7, where the breakpoint was set. We can see this by the fact that the line is highlighted in yellow.
The other big change is that on the left side of the screen there is a window called variables. It is mostly empty, but eventually we’d like it to be able to show us what’s going on with our program as it runs.
In order to proceed, click the Step Over button at the top of the window:
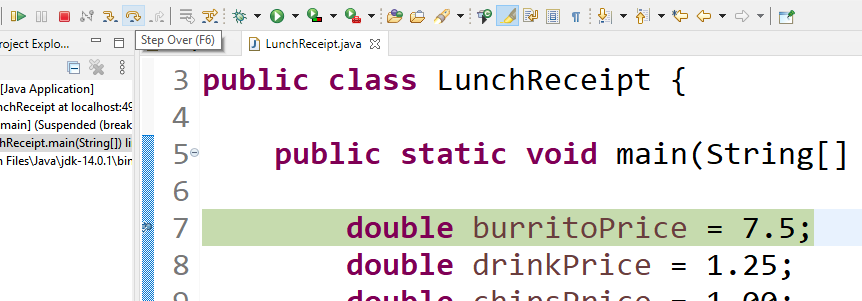
Notice what happened: the next line is now highlighted and a new entry appeared in the variables window in the top right:
Line 7 of the program was executed and we can now see the results. The variable was created and we can see its value in the variables window. Continue pressing the step over button to walk through the program, paying attention as the values appear.
Once you feel comfortable navigating through the debugger, click the red square to stop the debugger:

MileageReport
Choose a new group member to type.
Open MileageReport and run the program. (If you can’t find the file, click the Explorer button in the top left of the window).
Hmm… something doesn’t seem quite right about this one. There’s a mistake somewhere in this code. You might be able to find the error by simple inspection (it is not a particularly complicated mistake), but take the time to set a breakpoint and walk through the code. Can you use the debugger to see exactly when the mistake happens? How does this mistake affect the lines of code that are executed afterwards?
Once you have found the mistake, fix the relevant code.
BurritoBudget
Choose a new group member to type (or, if your group has 2 members, go back to the original person).
Open BurritoBudget and run the program. Uh oh, looks like there might be another error here. Again, use the debugger to figure out where the problem occurs and how to fix it. Reach out to your TA if you need help.
Message
For this part of the studio you will need at least two computers with the repository loaded. Have every group member load the studio repository into VS Code using the above instructions before proceeding.
As mentioned in the software setup, we’ll be using Git this semester. Git is a common tool that allows programmers to collaborate more effectively. In order to show off your work you’ll first need to get it off of your computer and onto the internet (specifically github), so the next part of the studio aims to show you how to do some basic Git operations to accomplish this.
Have someone who was not the original VS Code person import the studio repository. Explore the code and see how none of the changes you’ve made today are visible on this computer.
Have the VS Code person type a message in
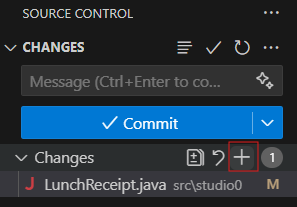
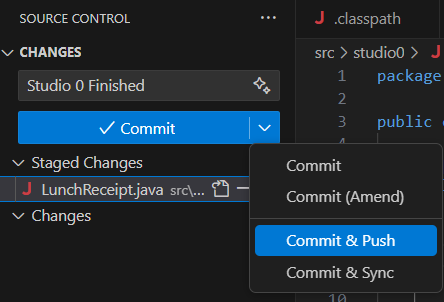
Message.javaon their computer, then commit and push like so:Click the source control button on the left side of VS Code:

You must then tell get about the files you have changed by clicking the plus sign on the Changes view:
Type a message explaining the commit in the box as shown:
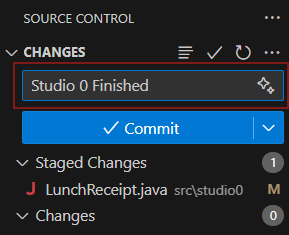
Finally, click the small arrow on the blue button and selection “Commit and Push”:
Open the GitHub webpage for your repository (that you created in the very beginning of the studio). If you navigate to the
Message.javafile, you should see the changes that you made.
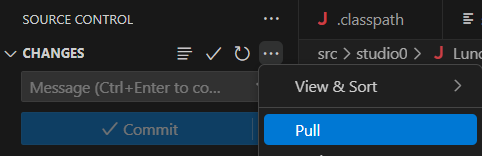
Have the non-VS Code person do a pull like so:
Click the three dots next to “Changes” in the source control view, then select “Pull”:
Confirm that all of the code you’ve written today is on your computer, including the message!
Have each team member take turns sending messages to the others using the above process. Be careful about multiple people sending messages at the same time. If two people try to send a message at the same time it is possible to end up with a conflict. While conflicts sound scary they are pretty common and easy to resolve. If you run into one be sure to flag down an instructor or a TA so we can walk you through it.
Demo (get credit for) your work:
Commit and Push your work. Confirm that the files you edited are updated on GitHub.
To get credit for your work, talk to your TA. Be prepared to show them the work that you have done and answer their questions about it!